The traditional green color coating that you see on the PCBs is the solder mask. Some PCBs also use different colored solder masks. When the board reacts with atmospheric air, it loses its chemical properties and also starts to rust. This is called oxidation. The solder mask prevents the board from reacting with oxygen. Besides, contamination such as dust and debris may get settled on the board which can lead to electrical shorts. The solder mask protects the board from environmental contamination and prevents shorts. The following goes into detail about what exactly a solder mask is, its DIY manufacturing process, and its purposes.
What exactly is a Solder Mask?
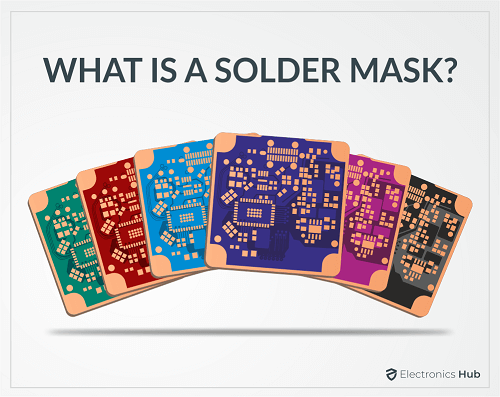
Solder Mask, also known as Solder resist, is a thin layer of a protective coating over the PCB board. Apart from the copper traces, the entire board is coated with the solder mask. The solder mask is coated on both the top side and bottom side of the PCB. Resin is the major ingredient in a solder mask because it offers good resistance against humidity and temperatures. On top of this, it does not conduct electricity. The green color of the PCB is due to the coating of the solder mask. Initially, most of the PCBs came in green color. But, now you can get different colored PCBs based on your needs. If the PCB is fully or partially exposed when integrating with the end product, then you can get a PCB with the color that complements the end product color. In some cases, the top side will have one color and the bottom side will have a different color. Arduino Uno board is a classic example of this.
What does it work for?
A solder mask is generally not used for hand-soldered boards. But, the ones that are commercially made on a mass scale will come with a solder mask coated on their surface. After coating the solder mask over the board, holes are made on the board where the components have to be soldered. The holes are made using the concept of photolithography.
Types of Solder Masks
PCBs come with different types of solder masks. Irrespective of the type, they all undergo a process of thermal cure after the pattern is defined. Below are the different types of solder masks,
Epoxy Liquid
The epoxy liquid solder mask is the most affordable of all. The solder mask is silk-screened through a pattern and is coated over the PCBs.
Liquid Photoimageable Solder Mask
Liquid photo imageable solder masks, shortly known as LPSM, can either be silk screened or sprayed on the PCB. They pass through a pattern that develops holes in the coating on areas where the components have to be soldered to the copper pads.
Dry Film Photoimageable Solder Mask
Dry film photo imageable solder mask, shortly known as DFSM is first laminated on the PCB. It is then passed through a pattern to develop holes for soldering components to the copper pads.
Solder Mask Manufacturing Process
There is a common misconception developing that making a solder mask is simple and you can do it yourself. It is not entirely true. The DIY solder masks will only work on simple-design PCBs. Besides, you have to be aware of the current trends, use correct equipment and manufacturing processes to develop reliable solder masks. Below are the steps you have to follow while manufacturing solder masks,
Step 1: Cleaning the Board
Before starting the process, you have to ensure the board is clean and free from dust. Besides, the board should be dry.
Step 2: Ink Coating the Solder Mask
After cleaning, place the board into a vertical coater. You have to decide the thickness of the solder mask by considering the number of electronic components, reliability demand, and board thickness.
Step 3: Pre-hardening
The main purpose of this process is to ensure the ink coating is solid on the board and remove the excessive coating.
Step 4: Imaging and Hardening
This process involves covering the board with a transparent film that has circuit images. Then, subject the board to UV exposure. The part of the board that is not covered by the circuit images of the transparent film will become hard. The part covered by the circuit images still remains in the pre-hardening state. You have to take great precautions in ensuring that you have aligned the transparent perfectly depending on where you want the copper foil. Otherwise, the whole process will be wasted.
Step 5: Developing
Now, put the board into a developer to clean the excessive solder mask. This will clearly expose the parts where you want to implant the copper foils.
Step 6: Hardening and Cleaning
Now, again harden the board so that the ink coating becomes hard on the board surface. Then, clean the board to remove any dust particles from its surface. After this, you can smoothen the surface, integrate the copper foils, and assemble the electronic components.
Design Tips of Solder Mask
It is still possible to design a PCB without the solder mask. But the solder mask makes the PCB reliable and increases the lifetime by preventing oxidation and preventing solder bridges. Using the latest software, you can create an automated solder mask. You do not have to design the transparent cover using your hand. Before designing the board, contact the board manufacturer to check the size and thickness of the board. Besides, you have to understand the spacing that you can give between copper pads. The most common reasons for PCB failure are due to excessive solder mask openings, insufficient openings, and a mismatch between the number of openings and copper pads. To prevent this from happening, you have to take extra precautions while making the design of the transparent cover with circuit images. Take extra care during the design file modification and confirm the design matches with the requirements of the electronic components. Comment * Name * Email * Website
Δ
![]()
![]()
![]()
![]()
![]()

