Again, due to the unavailability of storage space on the target device, backup may not be created. There are various other reasons that I have mentioned ahead in the guide. Usually, iPhone users prefer taking backup of their device data to a PC or Mac due to the abundant storage they get. So, coming across errors that hinder creating or restoring the backup on iTunes is undesirable. Let’s get into the details of this issue and sort it out.
Reasons Why iTunes Could Not Backup the iPhone
iPhone with maximum storage space is expensive. Hence, most users who are not power users, prefer the iPhone with 64GB storage. This is meager storage and gets filled in no time given today’s data and information-rich use cases. Hence, the users look for auxiliary storage where they can back up their present device data. Then on their main device(the iPhone), they will store new data.
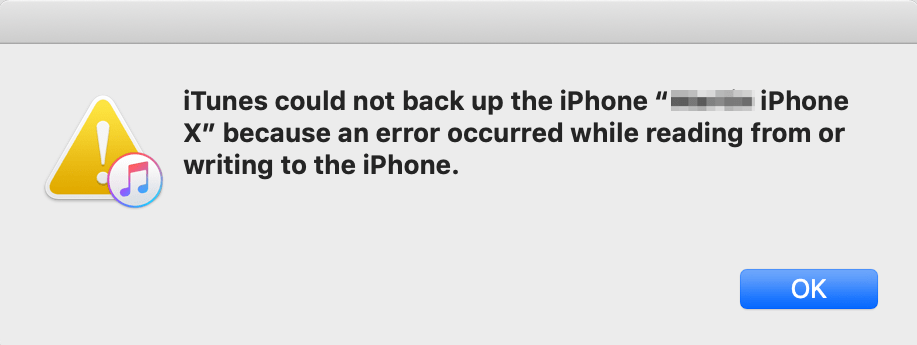
iTunes is a great choice for creating backup but for various technical issues, it fails to backup the iPhone data.
You may be using an older version of iTunes that denies compatibility with the PC/Mac.The iPhone and the computer are not properly connected indicating that there may be a fault in the connecting lightning/USB cable.There is not enough disk space available on the computer to create a backupYour computer’s security system such as Windows Defender or Third-party Anti-virus is not allowing iTunes to create a backup. The backup process never ends.There is some bug in the current version of iOS installed on your iPhone.Your computer (Windows OS) may be running a buggy OS that is not letting iTunes sync or create a backup.The previously created backups have become corrupted which is not letting you create a fresh backup.
Now, let us check out the troubleshooting methods that can effectively fix iTunes and it can resume creating backups smoothly.
Restart iPhone
If iTunes could not back up your iPhone, try to restart your iPhone. Often rebooting fixes several technical snags.
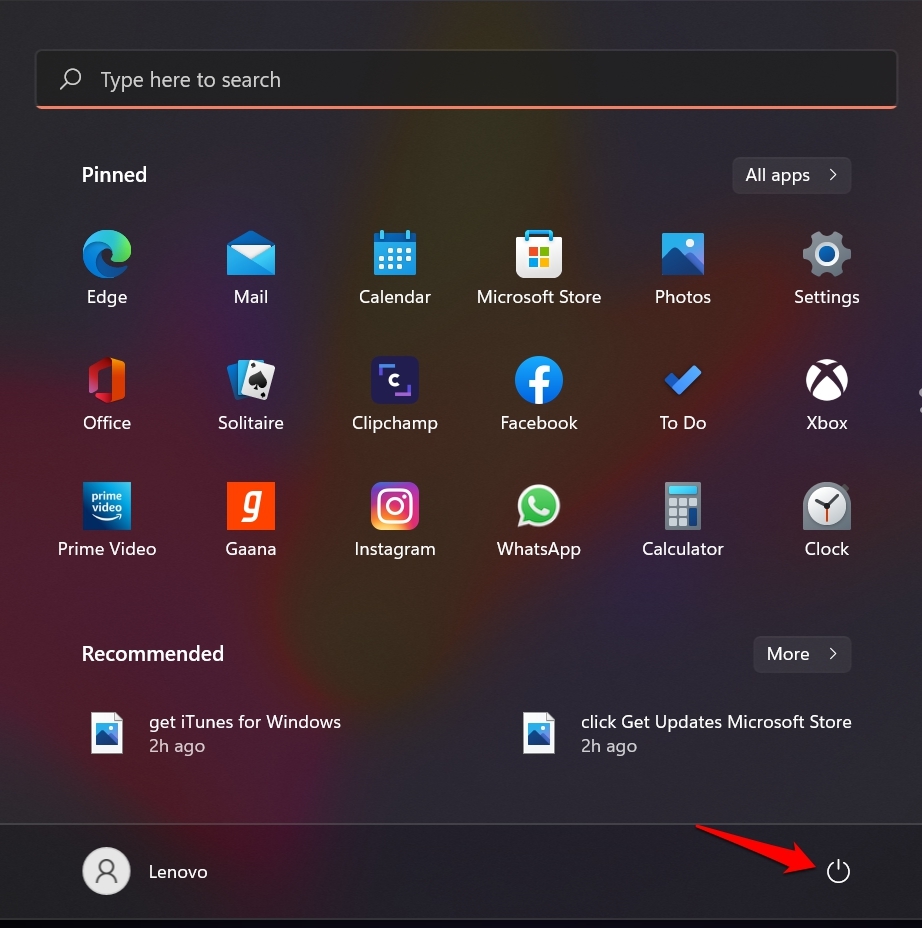
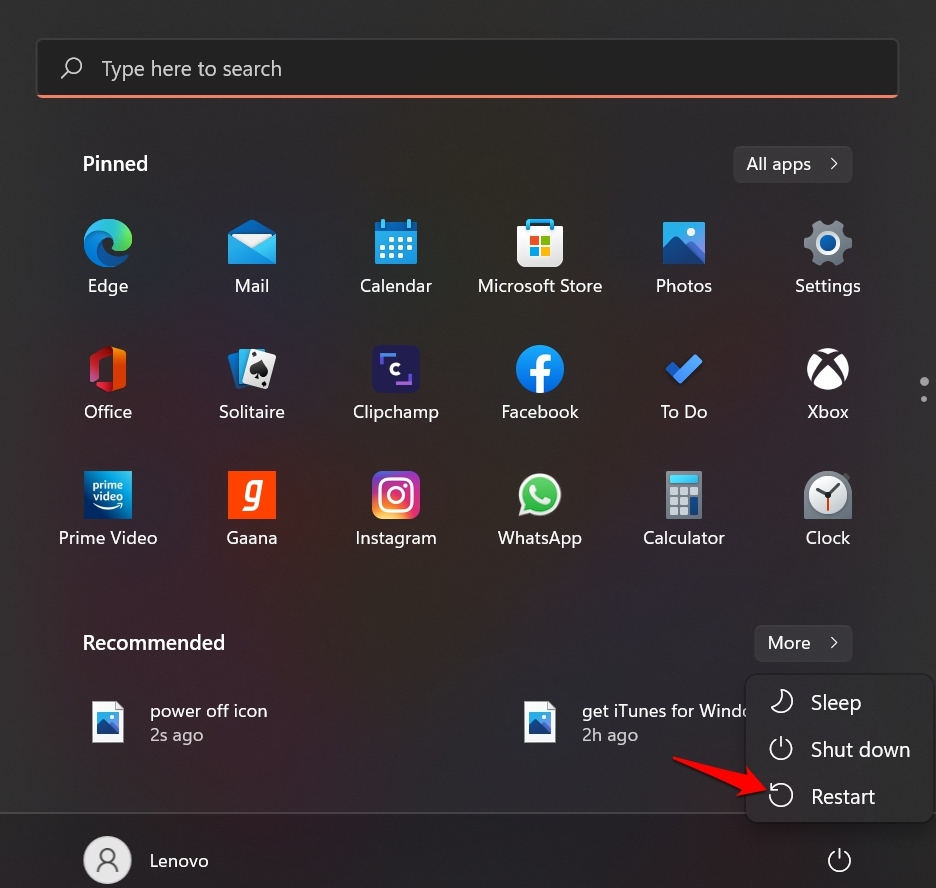
Restart Your Computer
Like you reboot your iPhone, you may also try to restart your computer. Often there may be minor glitches on the PC as well. So, if iTunes doesn’t seem to respond or you are not able to create a backup, try to restart the computer. As I’m using a Windows 11 OS based computer, this is how I will reboot it. After the PC reboots, connect your iPhone to iTunes and try to create a fresh backup.
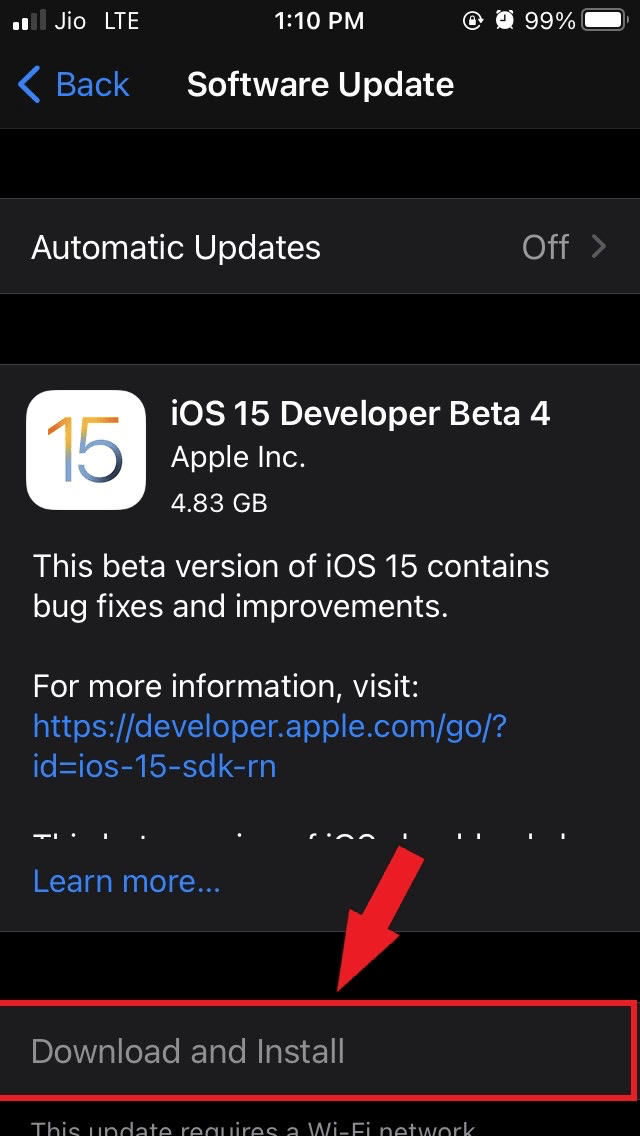
Update iOS
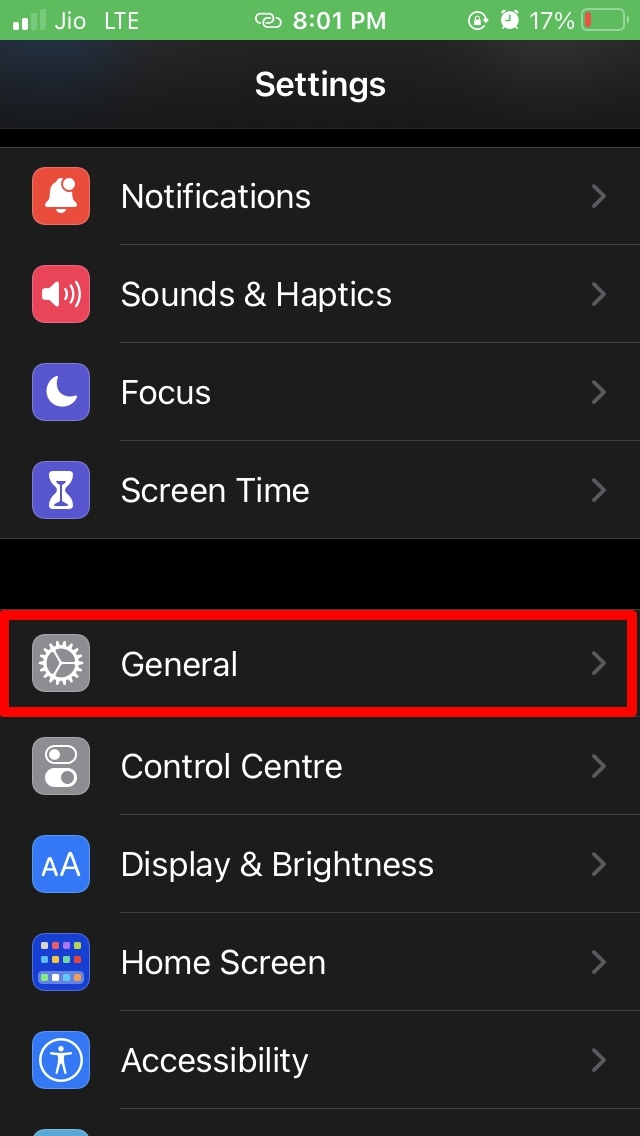
When repeatedly you are not able to create a backup on iTunes, then it may happen due to an older build on iOS installed on the iPhone. So, it is wise to update your iOS if you have not done it yet. After updating iOS, try to create iTunes backup again.
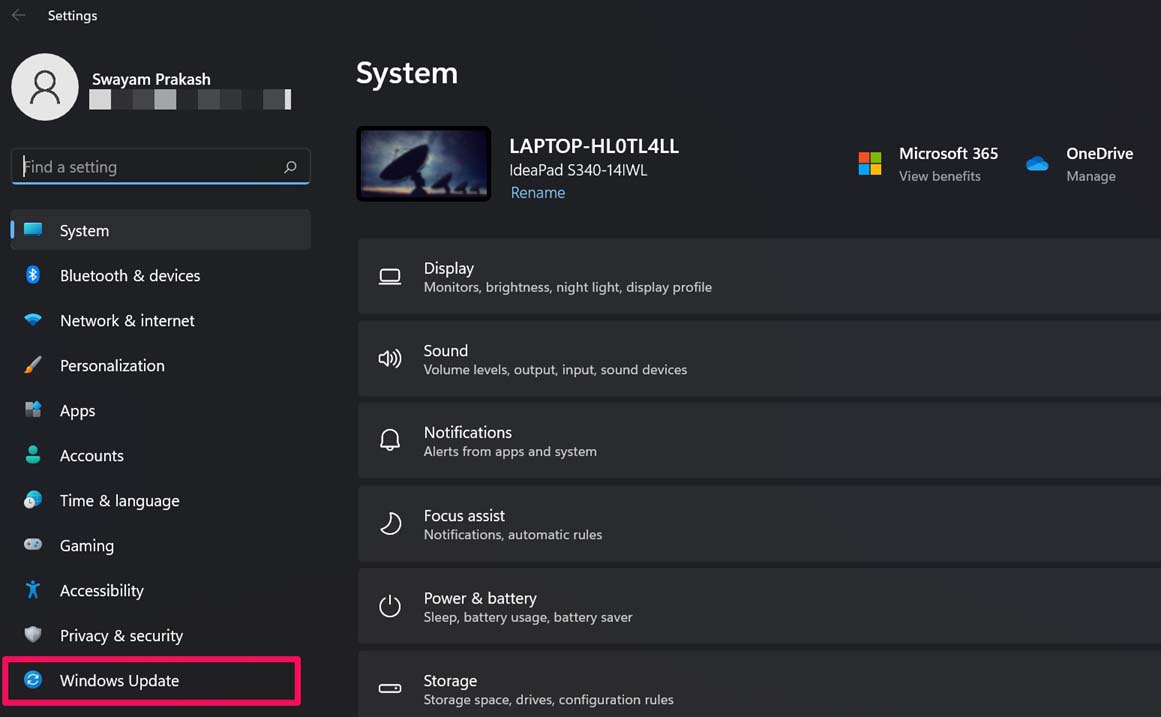
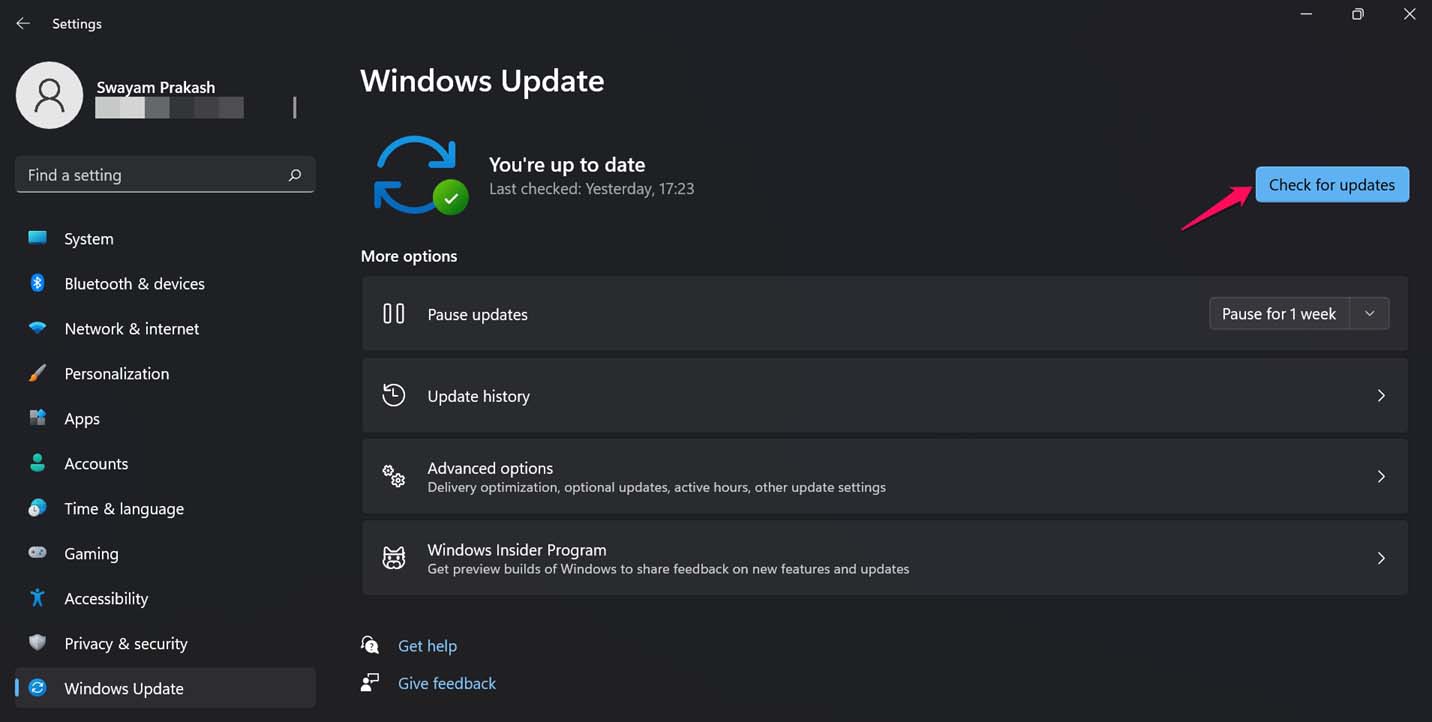
Update Windows OS
Also, Windows 11 is quite new and it brings a fair share of bugs. Microsoft has been rolling regular updates to fix the bugs that show up now and then on Windows 11. After upgrading to the latest version of Windows 11, check if iTunes still could not back up your iPhone. If not then move on to the other troubleshooting tips.
Use the Latest Version of iTunes
Check that you are using the latest version of iTunes on your Windows computer. Either Windows OS is running an older build and you have installed the latest version of iTunes or vice versa. Both ways due to version incompatibilities functional features of iTunes may not work. Hence, iTunes could not backup your iPhone data. To fix that you need to update the version of iTunes installed on your PC. Alternatively, you may uninstall iTunes and reinstall it from Apple’s official website which will redirect you to Microsoft Store to download/install the application.
Check the Connecting Cable is Working Fine or Not
Before thinking of creating an iTunes backup you need to ensure that the cable that you will be using to connect the iPhone with the computer is working fine. If your iPhone is not showing as connected or no syncing is happening even after repeatedly connecting and disconnecting the USB/Lightning cable from the PC, then get a replacement cable. Always stick to using the original cables. If you are using an iPhone, try to use original connecting cables from Apple. Often users use cheaper alternatives that may be faulty or they won’t work upon connecting as the device won’t recognize it.
Use iCloud Backup to Create Backup of Your iPhone
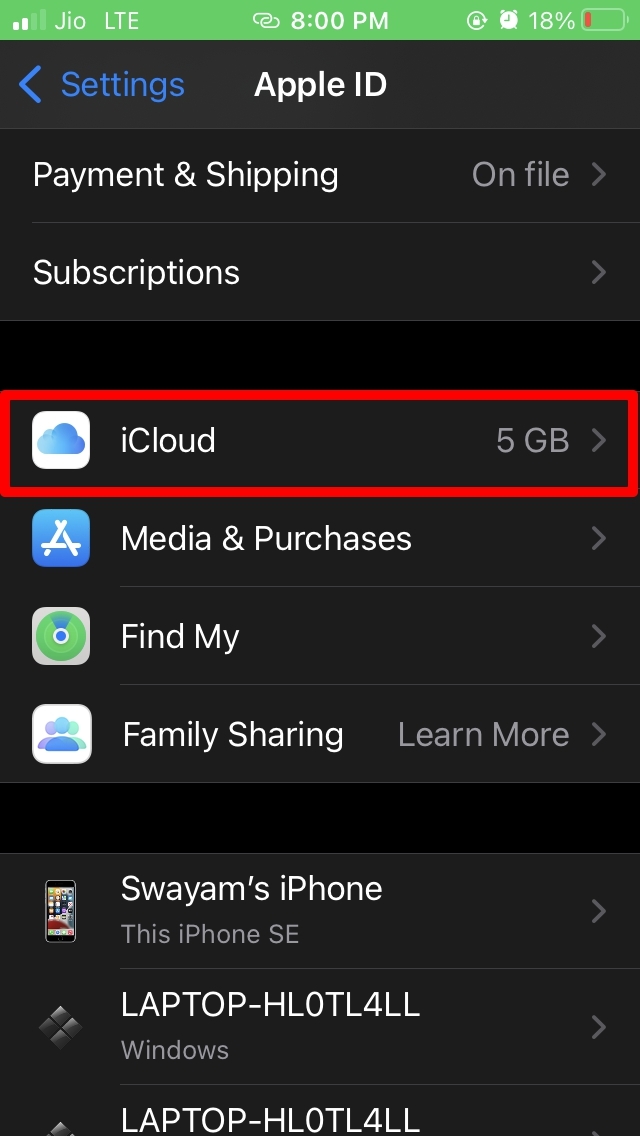
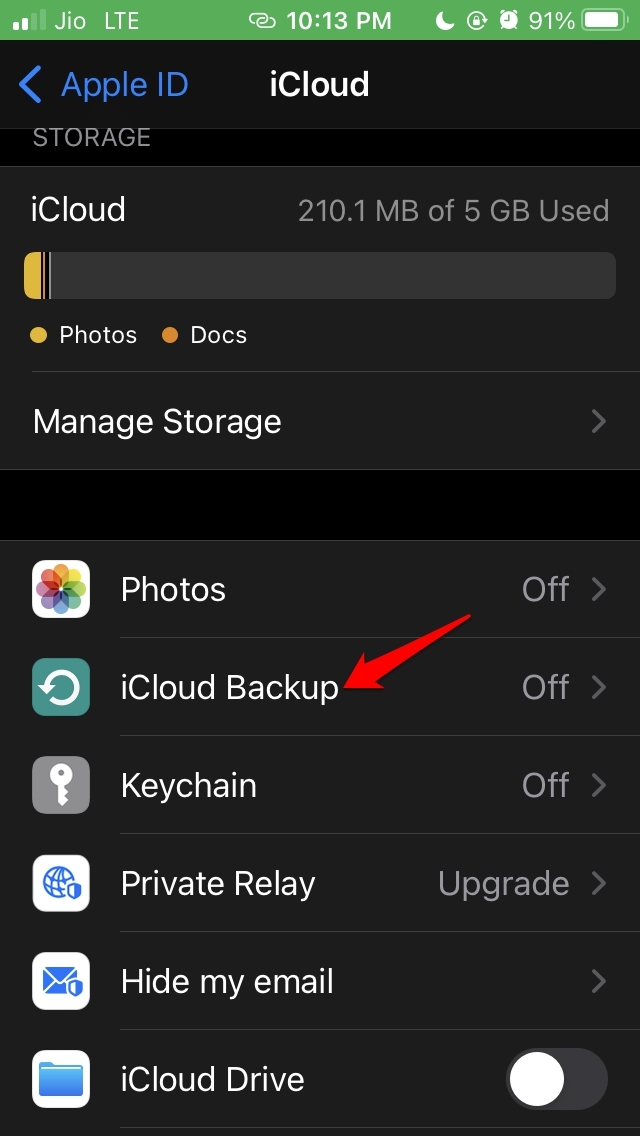
While you get limited free cloud storage on iCloud, it is a possible alternative to create a backup of your iPhone data on. Also, if you have already run out of free cloud storage of 5G on iCloud, then you may delete existing files on iCloud or pay and purchase more cloud storage space. If you have never used iCloud or seldom used it to take backup, then you can create a backup in case iTunes could not backup your iPhone. Make sure that the iPhone is connected to a WiFi network. Then only the backup process will begin and start backing up data from all those apps and services that you have allowed. Under the iCloud section on your iPhone, there will be a storage distribution bar that will show you how much iCloud space has been used.
Delete Corrupt iCloud Backups on the Computer
Often there may be the existing iTunes backups that the computer OS or the iOS may deem as corrupt. This will not allow you to create new backups. Also, you won’t be able to restore the existing backups. In this case, try to update the Windows OS or the iOS and both if possible. Then try to create a backup. If you are still facing the corrupt backup detected message, This should fix the issue.
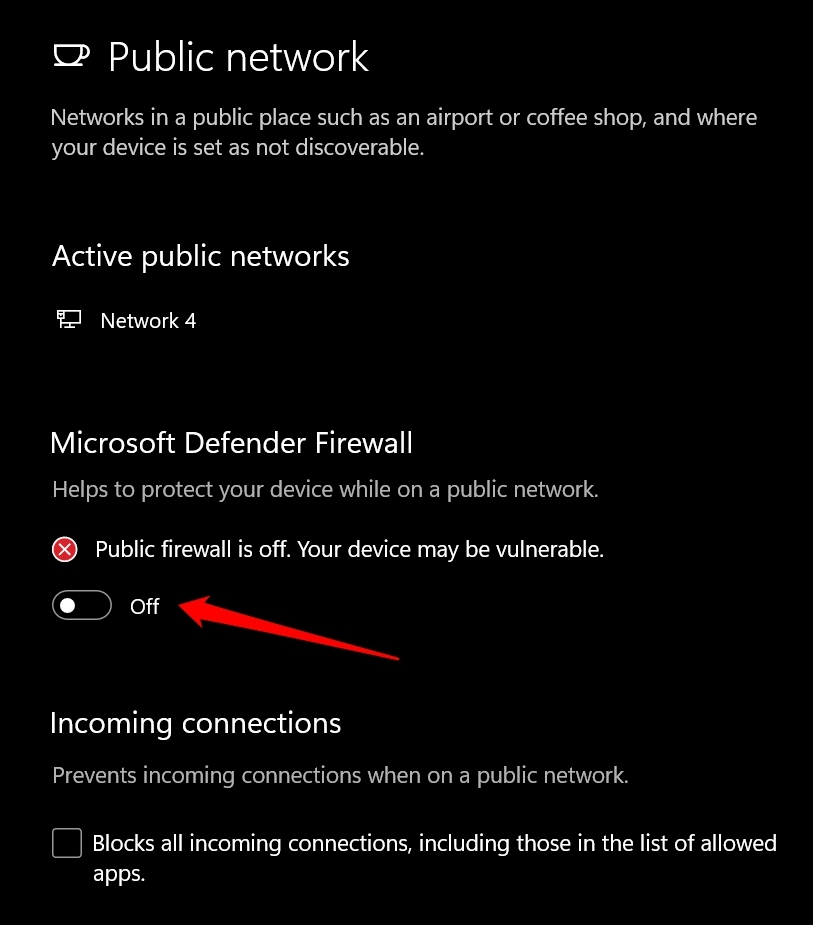
Disable Anti-Virus Software While You Create iTunes Backup
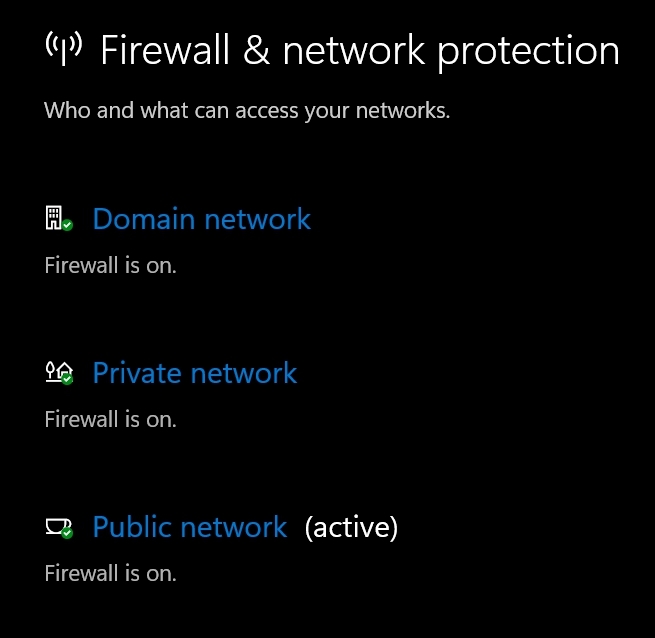
Sometimes the anti-virus on your computer may not allow iTunes to run. In that case, you need to disable the antivirus software. Now, on my PC, I use the native Windows Defender service which protects my computer. So far on Windows 10 or currently on Windows 11, it has never interfered with iTunes. I can easily connect, create backup and restore from my iPhone without any hassle. Still, if you are using the Windows Defender and facing an issue with iTunes regarding creating a backup of your iPhone data, then disable the Firewall protection for the duration while taking the backup Next, immediately launch iTunes and create a backup. You should not face any hassle while carrying out the backup. After taking the backup, make sure to follow the steps above and re-enable the Windows Firewall. If you are using third-party anti-virus programs, then right in the shortcut icons tray in the taskbar you should see an icon for the antivirus that you have installed on your PC. Click or right-click on it and you should see an option to temporarily disable the anti-virus. Click on that.
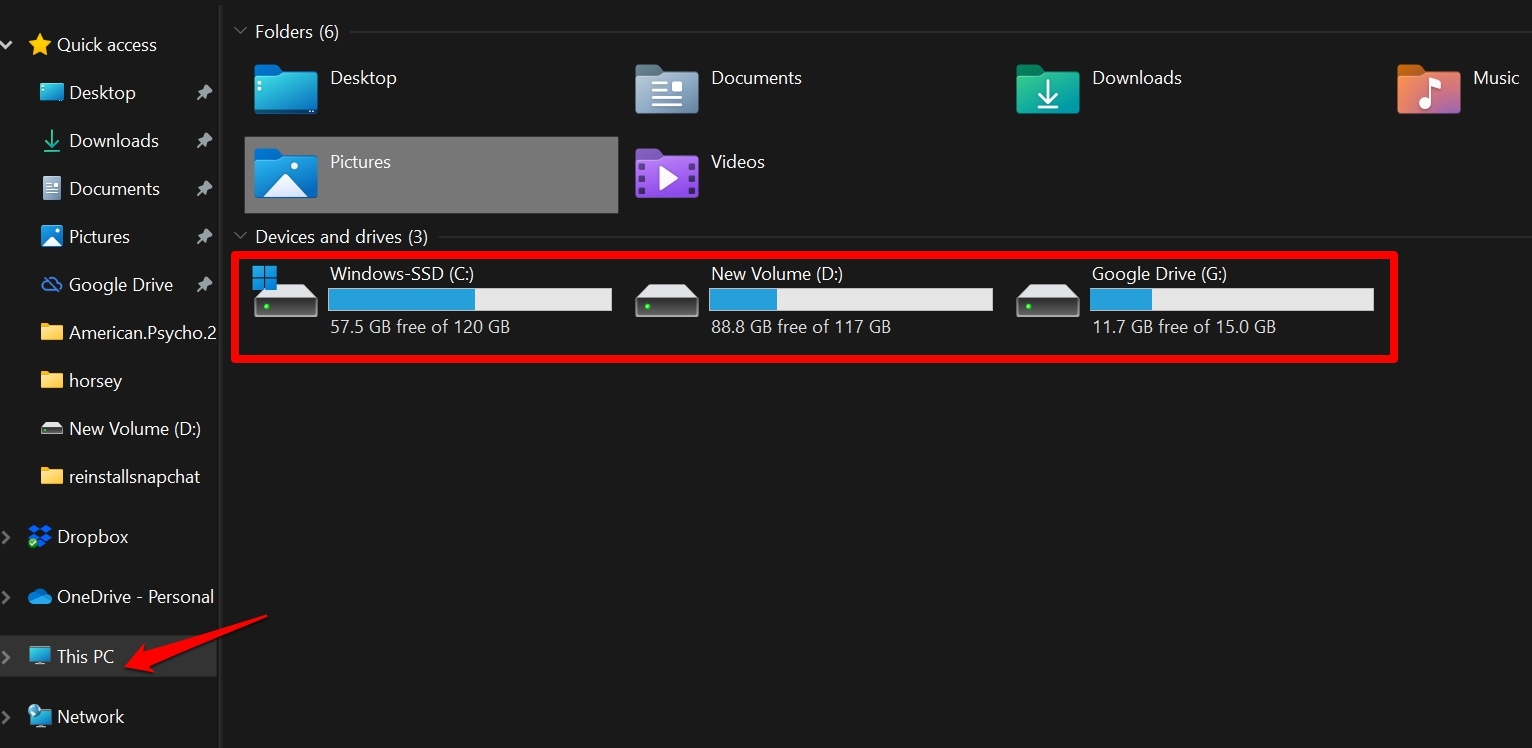
Do You Have Sufficient Storage Space on Your Computer?
If iTunes could not back up your iPhone to your PC, then do ensure that you have sufficient storage available on your computer to handle a new backup. To check for storage on your SSD/hard drive, Otherwise, you can connect an external hard drive to the computer through one USB port. Then connect the iPhone to the PC through the second USB port to create the backup. Instead of storing the backup to device storage, as the external storage will be showing, you can directly save it to that directory. Once the backup is created, you can remove the external drive. So, these are the various ways by which you can fix the iTunes could not back up your iPhone error. Taking regular backups is important to safeguard your data. As iTunes is a great service for creating a backup on non-Apple platforms, make sure you fix the errors associated with it to enjoy hassle-free backup and restore of your iPhone data.