The auto-login feature allows you to log inside the device bypassing all the previous steps. But, that also raises a question. Is it a safe method? After all, the password protects the credentials and the important information of your device. But, if you can use the auto-login feature with proper security assistance like antivirus and authentic applications, you may not face such security issues. And if your device is located in a trusted location, you can use the auto-login feature without any issues. On top of that, you don’t want to waste minutes every time logging in to your device. In this article, you will get a comprehensive idea of using the auto-login feature for any Windows 10 device. Hence, read on to know more-
How to Turn On Auto-Login in the Windows 10
1 – Open Run Dialog Box
First, press the Windows Key and continue holding it. Then, tap on “R” and release the windows key. This will open the Run Dialogue box on your screen. Alternatively, you can also use the quick access menu to find the Run menu. For this, right-click on the “start” button. Now, scroll downwards till you find the “Run” application.
2 – Open User Accounts Window
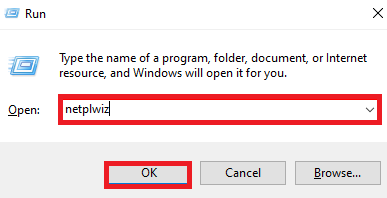
Next, type “netplwiz” in the Run window. After this, click “OK”
3 – Turn Off Password Protection
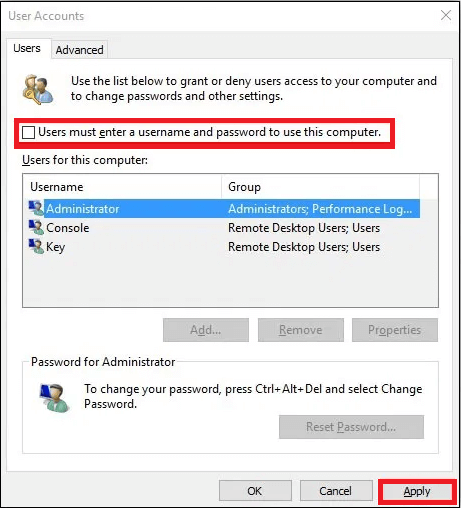
A new window will open on your screen. The window will display all the listed users on your device. On the top of the dialogue box, you will find the option “Users must enter a username and password to use this computer“. You have to uncheck this feature. Now, click on the “Apply” button.
4 – Confirm Your Action
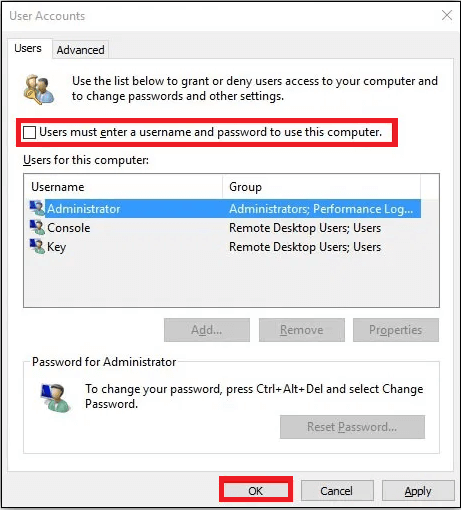
A new window will appear on your screen. Here, click on the “OK” button. You will again have to put your username and password to confirm the information. After entering your credentials, click on “ok” once more. You may see the login screen next time you open your device, But you do not need to put your credentials there. The device will allow you to use the auto-login feature from now on.
How to Turn On Auto-Login with Windows 10 Registry
Changing the registry is crucial as you need to perform each step carefully. If you perform a single step wrong or miss a single step, your device will face adverse results. Hence, it is better to remember each step properly to prevent mishaps. Besides that, you also need to get a backup of all the stored data before changing the registry
1 – Access Registry
First, open the “Run” from your windows device. You can either use the command “Windows key+R” or open the Run from the Start menu.
2 – Open Registry Editor Tool
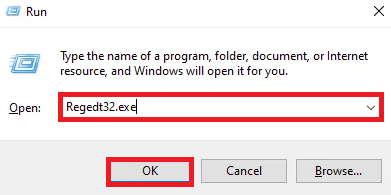
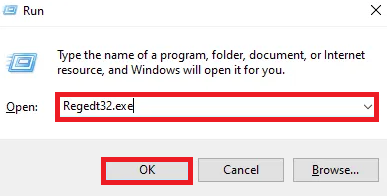
Now, type the command “Regedt32.exe” in the Run text box. After this, click on “Enter”.
3 – Find Right Subkey
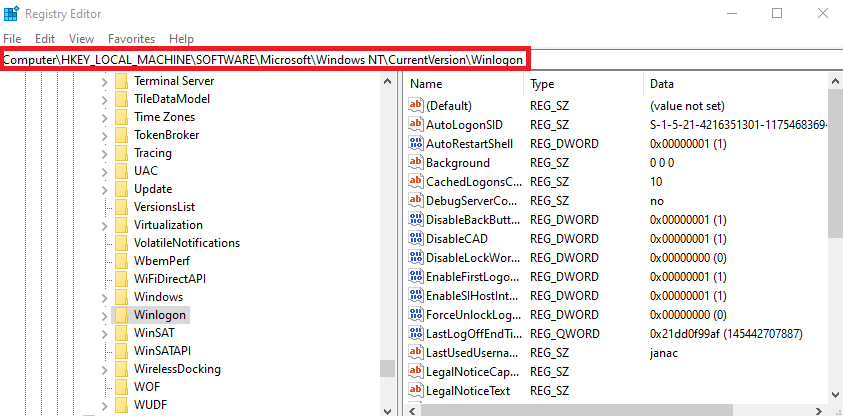
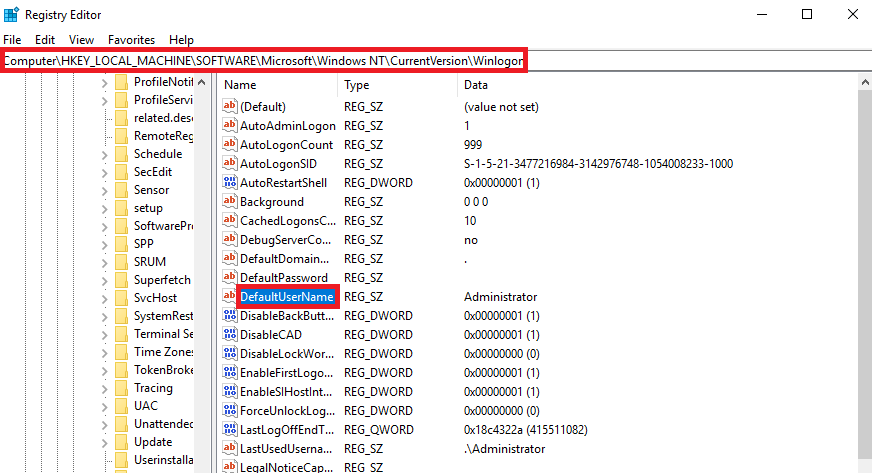
Your screen will display a new window with different folders and files. You need to find the exact location by using this command- “HKEY_LOCAL_MACHINE\SOFTWARE\Microsoft\Windows NT\CurrentVersion\Winlogon.”
4 – Define Registry Change
After this, you need to change the registry definition. First, double-tap on “DefaultUserName”. A new window will open. In this new window, you have to type your username. Now, click “OK”.
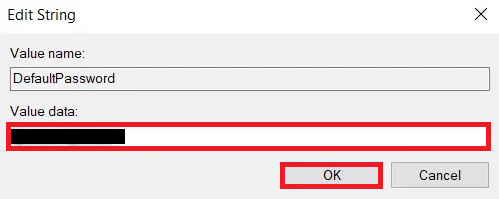
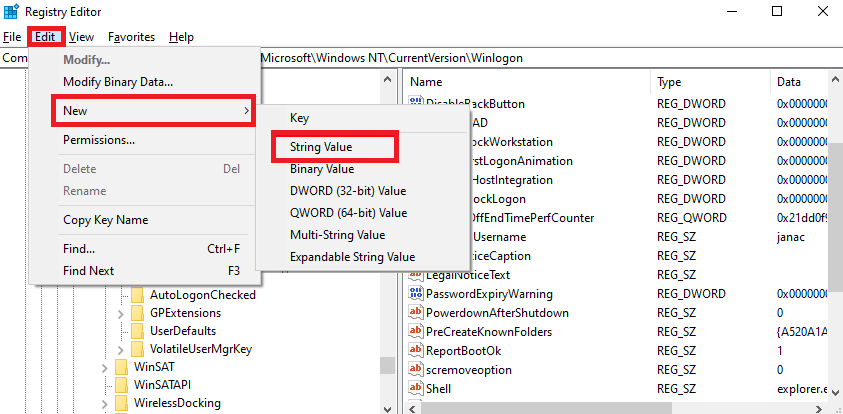
Next, find the “DefaultPassword” entry and select it by double-clicking. Here you need to enter your password. After this, click “OK” In case you do not have a separate entry named “DefaultPassword”, you need to follow the steps mentioned below- First, go to the “Edit” menu. Next, select “New”.
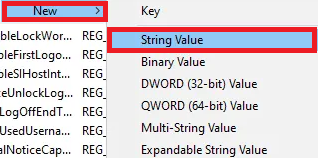
From here, go to “String Value“.A new box will open. Here type “DefaultPassword” and click “Enter”.
5 – Change registry
First, visit the “Edit” menu. Select “New” and click on “String Value“
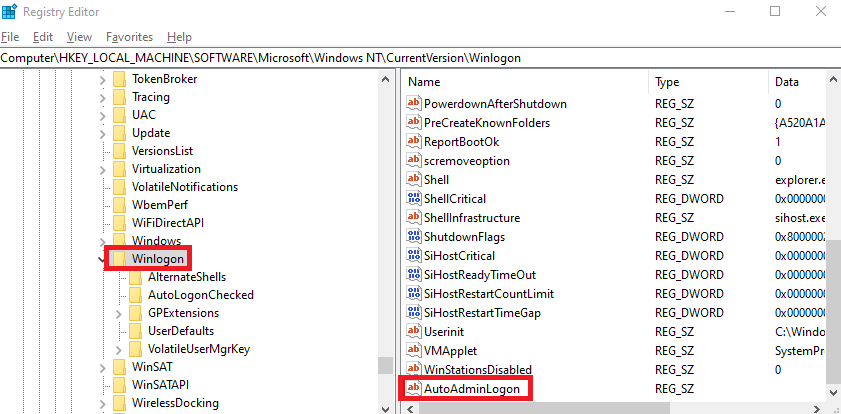
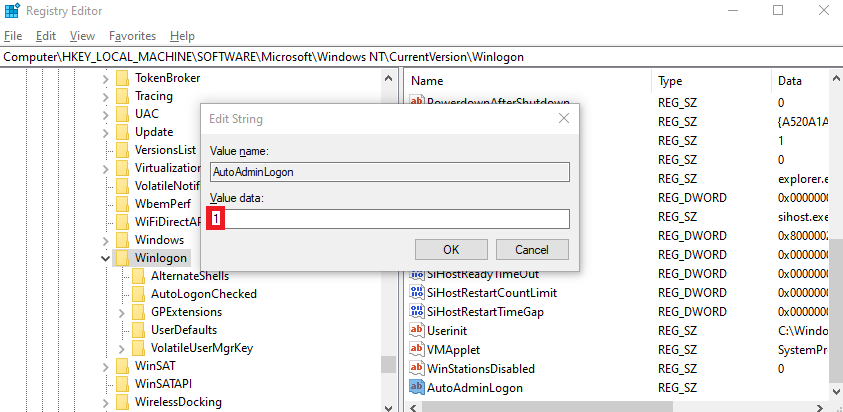
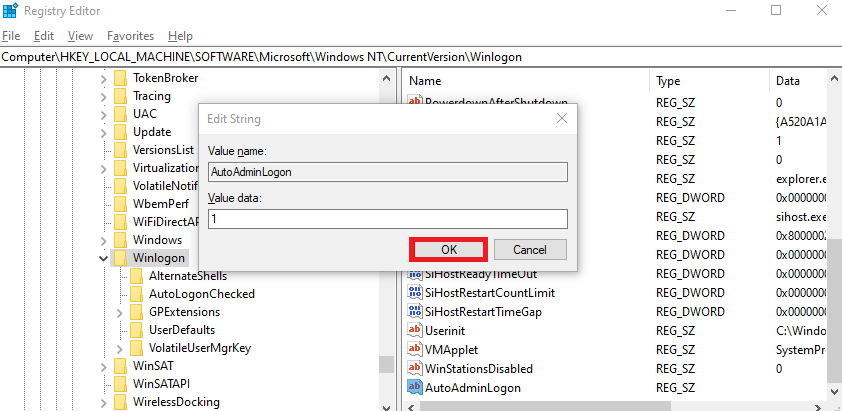
from here. Enter “AutoAdminLogon” for the new string value and click “Enter/OK“.
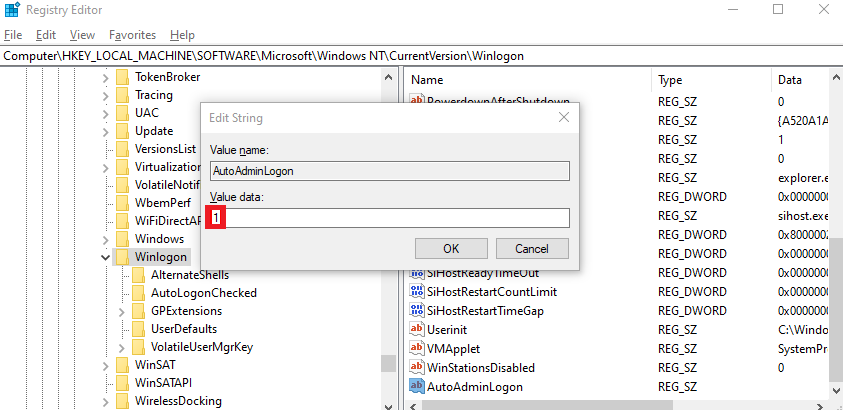
After this, double-tap on this new string value and navigate to the “Edit String” box. Here type “1” in the Value data field.
Click “Enter/OK”
You need to restart your computer to exit the Registry editor.
How to Turn On Auto-Login with Win 10 Domain Account
You can change the registry and add a new key for auto-login when you enable auto-login through the domain account. That procedure is straightforward to complete. You can follow these steps-
First, type “Regedit” to open the registry editor in the windows search box.
Alternatively, you can use the “Run” application for this. You have to type the command ” Regedt32.exe ” in the Run dialogue box.
If the left-hand pane types the key- “HKEY_LOCAL_MACHINE\SOFTWARE\Microsoft\Windows NT\CurrentVersion\Winlogon” Double-tap on “DefaultDomainName” and “DefaultUserName” to add the domain name and user name.
Next, add your user password by double click on “DefaultPassword.” After this, add the new key by navigating- Edit>New>String Value
Double click on “AutoAdminLogon” and add the value “1” to the Value data.
Exit the editor and restart the computer.
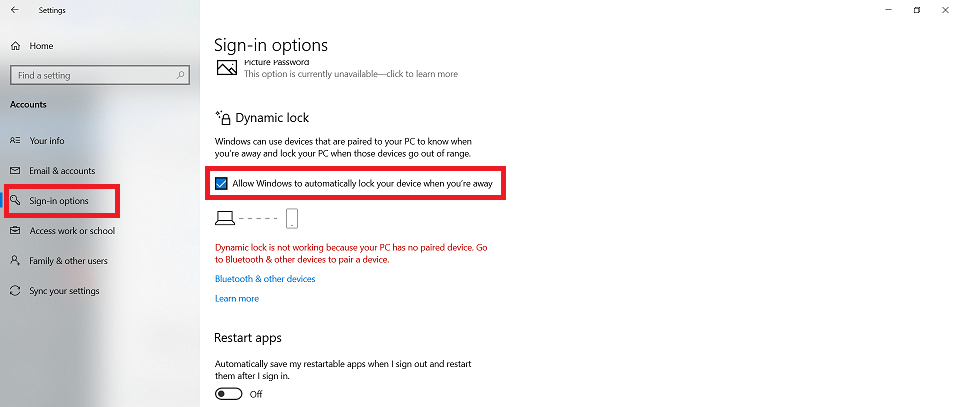
How to Turn On Auto-Lock in the Windows 10
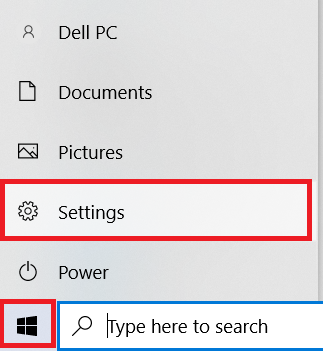
First, open settings.
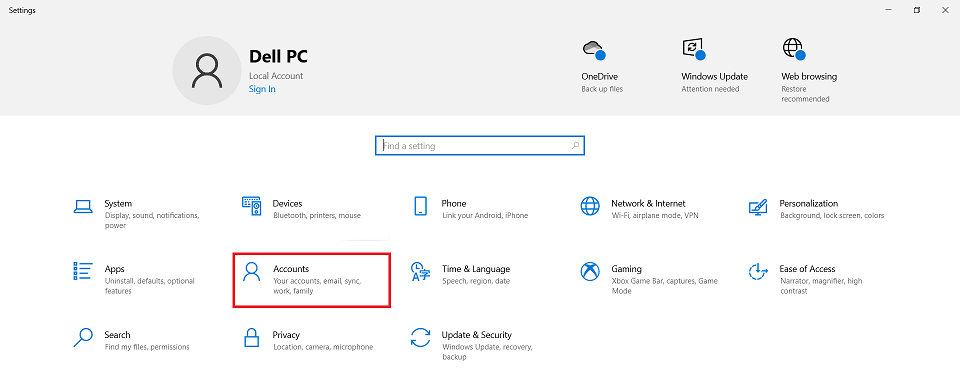
Next, click on “Accounts.”
After this, click on “Sign-in options. Now, open the “Dynamic Lock” & tick “Allow Windows to automatically lock the device when away.”
You can now unlock your device using your mobile as the Dynamic Lock feature also works with Bluetooth.
Create AutoAdminLogon Value if it is Missing
First, left-click on “Edit” and hover the mouse pointer over “New”. Next, click on “String Value”. A new pop-up box will appear on your screen. In the box, type “AutoAdminLogon” for the value and click Enter. After this, right-click on the “AutoAdminLogon” value to find the item “Modify”. Here put the value “1” in the value box. Finally, click “OK”.
Close and Restart
After you have completed it, close the registry editor and restart the computer.
Conclusion
The auto-login feature will allow you to log inside your device without your credentials instantly. You can follow the methods mentioned above to ensure you can bypass logging features to get auto-login for future purposes. Comment * Name * Email * Website
Δ
![]()
![]()
![]()

![]()
![]()

