After the removal of the HDMI port from the MacBook devices, connecting the MacBook to a TV became quite a task. So, if you are also finding the answers on how to connect a MacBook to TV, you’re probably at the right page as we have got two easy methods for you. Thus, make sure to give this article a thorough read.
How To Connect MacBook to TV
We have got two easy methods here to discuss by which you can simply connect any MacBook to TV without any issues. While one of the methods has wiring involved and might cost you a little. The other method is totally wireless and free, so you can try out whichever you feel most comfortable using.
1. Using a Cable
Determine which video outputs your MacBook has
As we mentioned earlier, MacBooks released after 2016 didn’t come with any HDMI or other video output port. In case you have an HDMI port on your MacBook model, you can directly connect it to any TV using an HDMI cable. Otherwise, if you see nothing but some Type-C ports, you can continue reading.
Buy an adapter cable
To convert the USB Type C port into an HDMI port, you will need to purchase an adapter that converts USB-C output into an HDMI port. Either you can choose to buy the one that is offered by Apple itself, or you can choose to go with some third-party option instead if you are on a budget. However, if you want a much more convenient option, you can purchase a USB Type-C to HDMI cable. That will directly connect your MacBook to the TV without any complications.
Turn your TV off
Before you connect your MacBook to the TV, make sure to turn it off otherwise you may face some problems and the MacBook won’t connect to the TV properly.
Attach the cables to the adapter
To connect your TV with the MacBook, you will need to use an HDMI cable. Hence, connect the HDMI cable into the HDMI port available on the adapter.
Connect the HDMI cable to TV
Once you have connected one end of the HDMI cable to the adapter, it’s time to plug in the other end of the HDMI cable to the TV’s HDMI input port.
Attach the cable from your adapter to your MacBook
Afterward, simply attach the adapter with your MacBook and complete the connection. Just for a crosscheck, make sure the adapter is plugged into the MacBook, and the HDMI cable is joined with the adapter and the TV as well.
Press the power button to turn on the TV
Now, simply press the power button on your TV to turn it on, and wait for a few seconds.
Switch your TV to the HDMI source your MacBook is connected to
With the help of your TV’s remote, go to video settings and change the video input to HDMI. If you have multiple HDMI ports on your TV, you will see options like HDMI1, HDMI2, etc. Hence, if you have plugged the cable into the HDMI 2 port, you will have to select HDMI2 in the video input settings also.
Open the Apple menu on MacBook
Now, open your MacBook and go to Apple Menu by clicking on the Apple logo at the top left of the screen.
Click System Preferences
From the drop-down menu, click on System Preferences.
Click on Display
Once the System Preferences window appears on your MacBook’s screen, click on Displays.
Click the Display Tab
You will see three different tabs at the top of the window, Display, Arrangement, and Color. Make sure the Display Tab is selected.
Press and hold and click Detect Display
In case your MacBook has not detected your TV until now, you can press and keep holding the Option button on the keyboard, and click on the Detect Display option.
Check the “Scaled” box
Moving on, inside the Display Tab, there’s an optimized option. Make sure it’s set to the Scaled option, if you want to change the resolution on your own.
Change the screen scaling
Apart from that, there’s an option that says, Underscan, in the same tab. You can drag the slider to either increase or decrease. It basically adjusts the zoom-in and out setting, which comes in handy to scale the video on the TV screen.
Click the on System Preferences
We are all done here with the display settings, now we need to move back to the System Preferences page, so simply click on the (⋮⋮⋮⋮) button, which is located on the top-left of the window.
Click Sound in the main window
Now, from the System Preferences menu, click on the Sound Option.
Click Output
As earlier, you will also see three tabs in this window too, Sound Effects, Output, Input. Make sure to select the Output Tab. It will show you all the audio output options which are accessible by your laptop at the moment.
Click your TV’s name
Since we have connected the MacBook to TV using HDMI, your TV’s speakers are also accessible by your MacBook device. So, your TV’s name should also appear on the list. Select its speakers for audio output, and you’re done!
2. Using AirPlay
Make sure you have an AirPlay-compatible TV or streaming device
In case you have an AirPlay-compatible TV like most Sony, Samsung, LG, and Vizio TVs, AppleTV itself, connecting any MacBook device to the TV is quite seamless as you can do it all without needing any adapter or any other kind of cable.
Power on your smart TV and/or streaming device
To begin, make sure you have turned on your smart TV and/or streaming device.
Make sure your MacBook and Smart TV or streaming device are connected to the same network
Now, to connect both the TV and MacBook with each other, it’s essential to have both the devices connected to the same Wi-Fi connection.
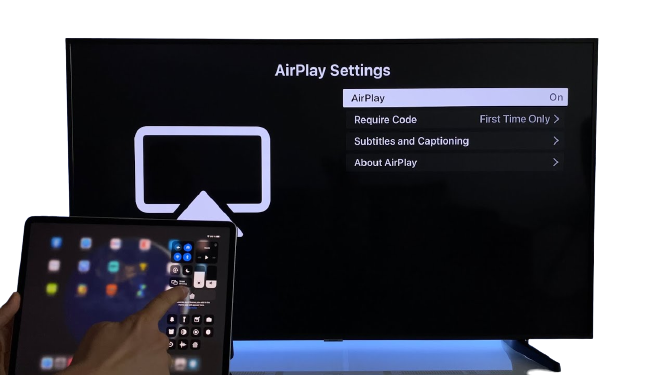
Make sure the AirPlay options are enabled on your MacBook
Before you proceed, make sure that you have screen mirroring settings enabled on your MacBook. To confirm that, you can go to System Preferences, and click on Displays. Now, check at the bottom of the window if the AirPlay Display option is On or not. Make sure to set it to On, and also tick mark the box that says, “Show mirroring options in the menu bar when available” to make things a little more convenient.
Click the AirPlay icon
After that, the AirPlay icon will start to appear on the top bar on your MacBook’s screen whenever it detects an AirPlay-compatible device on the network. Click on that icon to check the available nearby devices.
Click Mirror Built-in Display or Mirror [device name]
Once you click on the AirPlay icon, it will show you a drop-down menu. Click on the Mirror Built-in Retina Display option, or Mirror (your device name) option, depending on your MacBook model. While the Mirror Built-in Retina Display will match the output with the size of your laptop’s monitor. The Mirror (Device Name) option will scale the output to the size of your TV screen.
Enter the AirPlay passcode
Select the option whichever you like to proceed with, and then enter the AirPlay Passcode to establish the connection. To stop screen mirroring, you can simply turn Off the AirPlay option on your MacBook device.
Conclusion
So far, we have covered up the two most convenient methods by which you can easily connect your MacBook to any TV. If you have a basic TV with no smart features, you can use the cable method. Otherwise, if you have a smart TV that is compatible with AirPlay, the second method is a good option to try. However, screen mirroring feels a little laggy sometimes. Hence, in case you want to have the best visual experience, using an adapter and connecting the MacBook to the TV via HDMI cable is the best option any day. Comment * Name * Email * Website
Δ
![]()
![]()
![]()

![]()
![]()

