In order to measure the body temperature, we use thermometers and a sphygmomanometer to monitor the Arterial Pressure or Blood Pressure. Heart Rate can be monitored in two ways: one way is to manually check the pulse either at wrists or neck and the other way is to use a Heartbeat Sensor. In this project, we have designed a Heart Rate Monitor System using Arduino and Heartbeat Sensor. You can find the Principle of Heartbeat Sensor, working of the Heartbeat Sensor and Arduino based Heart Rate Monitoring System using a practical heartbeat Sensor.
Output Video
Introduction to Heartbeat Sensor
Monitoring heart rate is very important for athletes, patients as it determines the condition of the heart (just heart rate). There are many ways to measure heart rate and the most precise one is using an Electrocardiography But the more easy way to monitor the heart rate is to use a Heartbeat Sensor. It comes in different shapes and sizes and allows an instant way to measure the heartbeat. Heartbeat Sensors are available in Wrist Watches (Smart Watches), Smart Phones, chest straps, etc. The heartbeat is measured in beats per minute or bpm, which indicates the number of times the heart is contracting or expanding in a minute.
Principle of Heartbeat Sensor
The principle behind the working of the Heartbeat Sensor is Photoplethysmograph. According to this principle, the changes in the volume of blood in an organ is measured by the changes in the intensity of the light passing through that organ. Usually, the source of light in a heartbeat sensor would be an IR LED and the detector would be any Photo Detector like a Photo Diode, an LDR (Light Dependent Resistor) or a Photo Transistor. With these two i.e. a light source and a detector, we can arrange them in two ways: A Transmissive Sensor and a Reflective Sensor. In a Transmissive Sensor, the light source and the detector are place facing each other and the finger of the person must be placed in between the transmitter and receiver. Reflective Sensor, on the other hand, has the light source and the detector adjacent to each other and the finger of the person must be placed in front of the sensor. Here are few simple Arduino Projects: 10 SIMPLE ARDUINO PROJECTS FOR BEGINNERS.
Working of Heartbeat Sensor
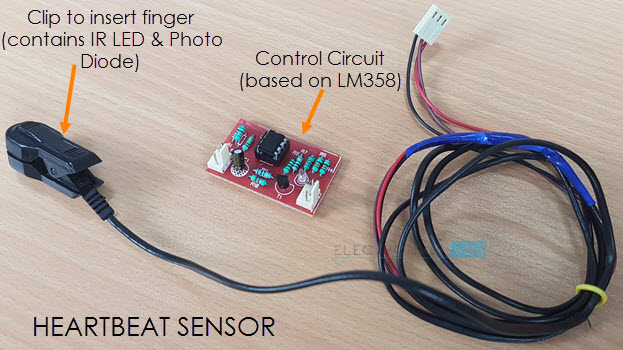
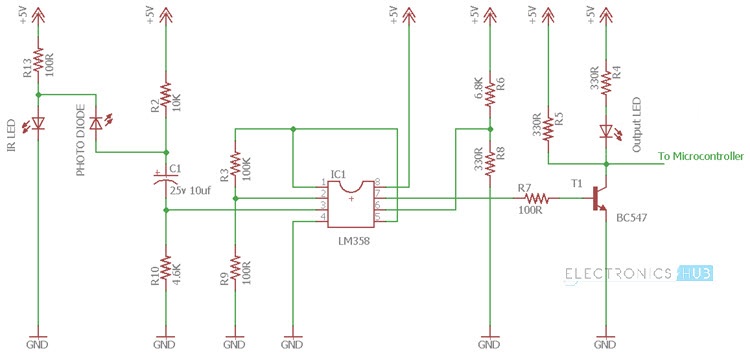
A simple Heartbeat Sensor consists of a sensor and a control circuit. The sensor part of the Heartbeat Sensor consists of an IR LED and a Photo Diode placed in a clip. The Control Circuit consists of an Op-Amp IC and few other components that help in connecting the signal to a Microcontroller. The working of the Heartbeat Sensor can be understood better if we take a look at its circuit diagram.
The above circuit shows the finger type heartbeat sensor, which works by detecting the pulses. Every heartbeat will alter the amount of blood in the finger and the light from the IR LED passing through the finger and thus detected by the Photo Diode will also vary. The output of the photo diode is given to the non – inverting input of the first op – amp through a capacitor, which blocks the DC Components of the signal. The first op – amp cats as a non – inverting amplifier with an amplification factor of 1001. The output of the first op – amp is given as one of the inputs to the second op – amp, which acts as a comparator. The output of the second op – amp triggers a transistor, from which, the signal is given to a Microcontroller like Arduino. The Op – amp used in this circuit is LM358. It has two op – amps on the same chip. Also, the transistor used is a BC547. An LED, which is connected to transistor, will blink when the pulse is detected.
Circuit of Arduino based Heart Rate Monitor using Heartbeat Sensor
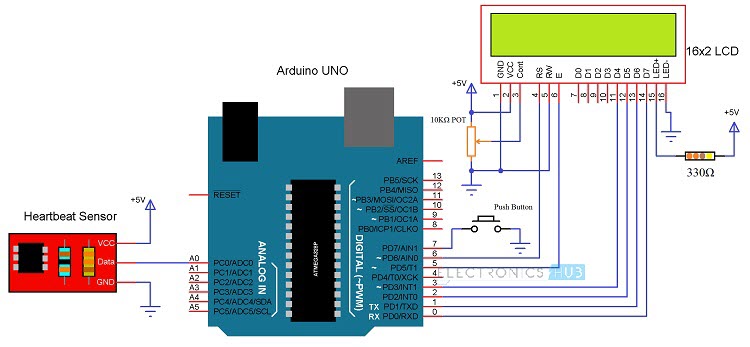
The following image shows the circuit diagram of the Arduino based Heart Rate Monitor using Heartbeat Sensor. The sensor has a clip to insert the finger and has three pins coming out of it for connecting VCC, GND and the Data.
Components Required
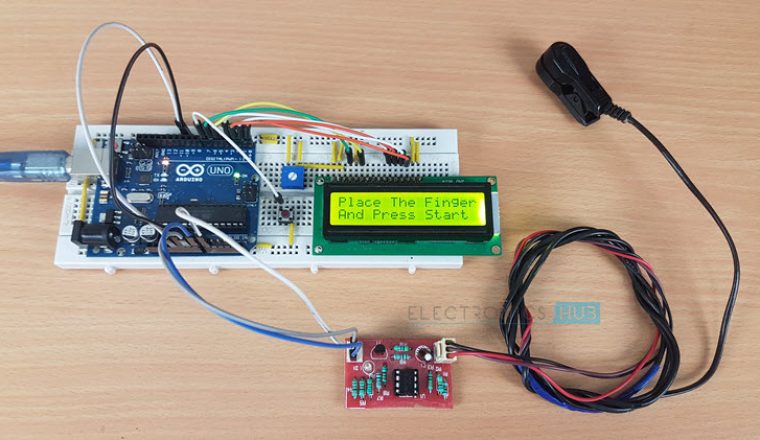
Arduino UNO x 1 [Buy Here] 16 x 2 LCD Display x 1 [Buy Here] 10KΩ Potentiometer 330Ω Resistor (Optional – for LCD backlight) Push Button Heartbeat Sensor Module with Probe (finger based) Mini Breadboard Connecting Wires
Circuit Design of Interfacing Heartbeat Sensor with Arduino
The circuit design of Arduino based Heart rate monitor system using Heart beat Sensor is very simple. First, in order to display the heartbeat readings in bpm, we have to connect a 16×2 LCD Display to the Arduino UNO. The 4 data pins of the LCD Module (D4, D5, D6 and D7) are connected to Pins 1, 1, 1 and 1 of the Arduino UNO. Also, a 10KΩ Potentiometer is connected to Pin 3 of LCD (contrast adjust pin). The RS and E (Pins 3 and 5) of the LCD are connected to Pins 1 and 1 of the Arduino UNO. Next, connect the output of the Heartbeat Sensor Module to the Analog Input Pin (Pin 1) of Arduino.
Working of the Circuit
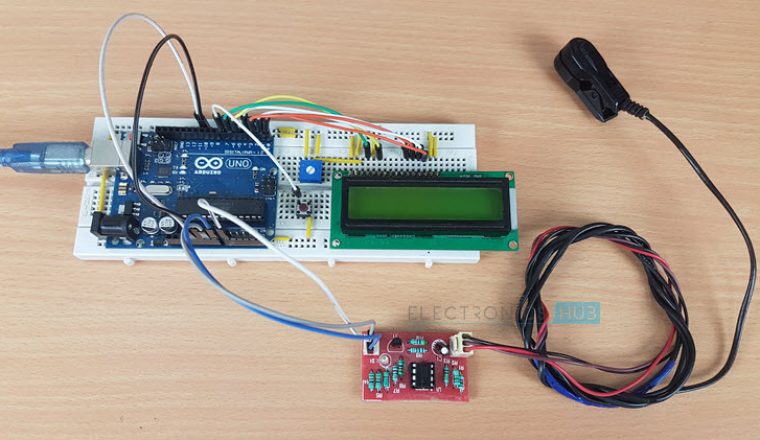
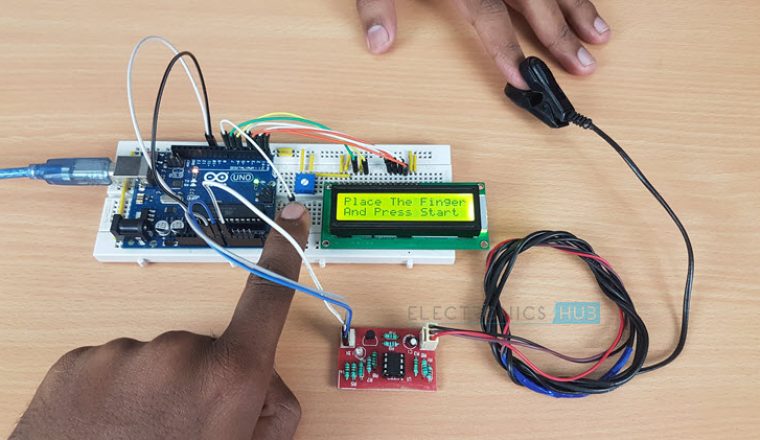
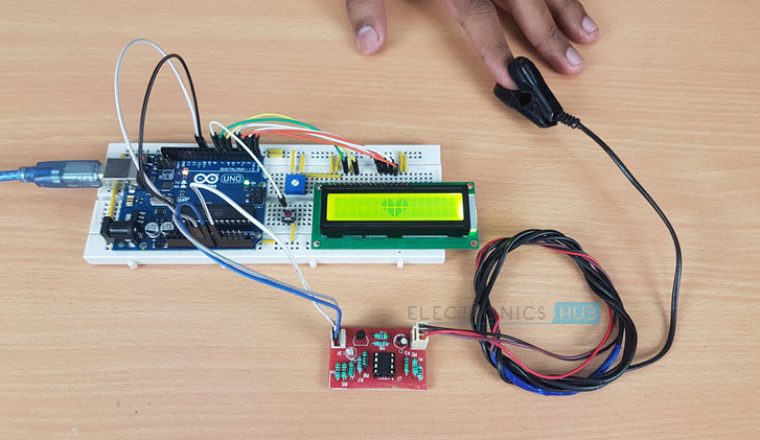
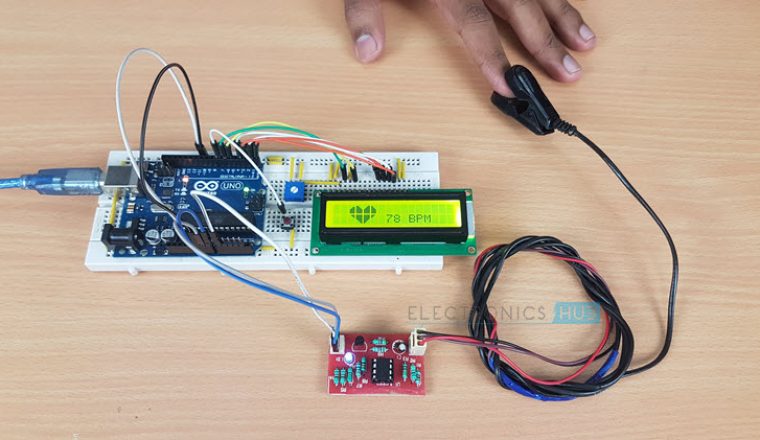
Upload the code to Arduino UNO and Power on the system. The Arduino asks us to place our finger in the sensor and press the switch. Place any finger (except the Thumb) in the sensor clip and push the switch (button). Based on the data from the sensor, Arduino calculates the heart rate and displays the heartbeat in bpm. While the sensor is collecting the data, sit down and relax and do not shake the wire as it might result in a faulty values. After the result is displayed on the LCD, if you want to perform another test, just push the rest button on the Arduino and start the procedure once again.
CODE
Applications of Heart Rate Monitor using Arduino
A simple project involving Arduino UNO, 16×2 LCD and Heartbeat Sensor Module is designed here which can calculate the heart rate of a person. This project can be used as an inexpensive alternative to Smart Watches and other expensive Heart Rate Monitors.
Could you pls help me to get the video of “Heartbeat sensor using Arduino (Heart rate monitor)”. Also pls let me know the step by step process for the same. Waiting for your response. Could you pls let me know the advantages of this project [Heartbeat Sensor using Arduino (Heart Rate Monitor)] over the Heartbeat using Mobile Apps?? Also how can we determine the Accuracy of this project? Thanks for your reply. I have assembled components based on the mentioned circuit diagram. In addition to the mentioned circuit diagram and code, I have used 1 LED interfaced with Push button. And I have used KY-039 heartbeat sensor. But I’m facing a problem when I press the button, It repeats the text on LCD as “Place The Finger And Press Start”. Could you pls let me know how can this issue be solved at the earliest?? I’m still waiting for you to upload the code for the robatic arm. Are you planning to share the code at any time? Thank you, Please can I get the code properly and all information about this project?? i know im pretty late but still… What if i use KY039,do i need to change the code or to change the gain??? Is it possible to connect (join) this circuit with the temperature sensor in order to display the BPM and the value of temperature of surrounding at the same time with the same LCD???? Please i need your response…help!!!!!!! Waiting for your response.. Comment * Name * Email * Website
Δ
![]()
![]()
![]()

![]()
![]()

