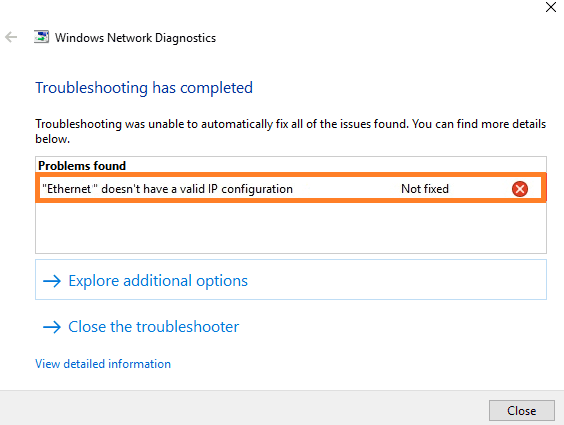
The IP address is verified at many stages such as your computer, your router, your ISP, and so on. Hence, a problem with your IP address might be caused at any of these stages and it might get a little difficult to pinpoint the root cause of the problem at times. In most cases, you will only see an exclamation mark on your internet connection icon which indicates a problem with your connectivity. After further investigation, you can find the reason behind the error once you try to troubleshoot your connection. One of the most common problems with Ethernet based connections is the “Ethernet doesn’t have a valid IP configuration” error. It can be a result of a problem with your router, your network adapter, or your ISP. But instead of relying on your ISP to fix the problem for you, you can try a couple of handy solutions which are proven to fix the problem for many users. Today, we will take a look at the solution to fix this problem so that you will be able to use your Ethernet connection right away.
How To Fix Ethernet Doesn’t Have a Valid IP Configuration Error
As you know, your computer can only connect to the internet if it is capable of providing a valid IP configuration. There are multiple types of IP addresses for a single computer such as a private IP address, public IP address, static IP address, dynamic IP address, etc. Also, there are mainly two types of IP addresses are IPv4 and IPv6 which include all of the IP address types mentioned above. Thus, a problem with any of the IP addresses in your computer will result in this error. This means that your computer can no longer provide a valid IP configuration to the service provider and hence, unable to connect to the internet. It could also mean that there is no valid IP configuration available at your Ethernet connection. The dynamic host configuration protocol on your computer is unable to obtain a valid IP address for your operating system. The DHCP is a crucial service in Windows OS that enables a server to assign an IP address for your computer. Thus, this error prevents you from connecting to the internet. There can be various culprits behind this error. In most cases, the problem is caused by problems with the software such as incorrect or corrupted network drivers, faulty network config, outdated router firmware, and so on. Thus, you will have to check all of these parameters to get to the root of this error and resolve it. In this article, we will try to ease this process for you and provide some solutions to fix the “Ethernet does not have a valid IP configuration” error easily. Here are some solutions that you can try right now.
1. Restart Your System
One of the easiest and certainly effective solutions to all Windows related problems is to simply restart your system once. When you restart your computer or your laptop, all of the drivers on your OS are shut down and restarted again. If there is a missing driver on your computer, Windows automatically detects the hardware and tries to install the driver at the time of boot automatically. Hence, if the error in your system is caused by a driver issue, it might get resolved after a reboot. You should also try connecting your system to the internet via other means and see if the problem resolves itself. In case you are finding any luck with the reboot, try disabling the fast boot of the OS. Fast booting usually skips the necessary repair protocols which might help with this error. Here’s how you can do that:
Open the Windows control panel by pressing the “Windows+R” keys and entering the “Control panel” in the Run window.
In the control panel, you will see many different sections. Change the “View by” option to Large icons to see more categories in the panel.
Now, you can see the “Power options” in the control panel. Click on it to proceed.
Now, find the “Choose what the power button does” link on the left hand menu and click on it.
This will redirect you to the Windows startup preferences window.
Now, choose the “Change settings that are currently unavailable” link to change the boot options.
Now, you can interact with the check boxes available in the window.
Uncheck the “Turn on Fast Startup” option to disable fast boot.
Now, restart the computer. Note that your computer will take a longer time to start.
If the problem persists after booting, you can enable the fast mode again and try other solutions.
2. Use Command Prompt To Reset TCP/IP
The TCP (transformation control protocol) IP address is designated to define how data should be transmitted between two systems. A problem with this IP address might also give you the Ethernet does not have a valid IP configuration error. To fix this, you will have to reset the TCP/IP manually. To do that, you will simply have to run a command in the command prompt. Here’s how you can reset the TCP/IP:
3. Clear The Network Cache From Your Computer
If resetting your TCP/IP failed or did not resolve your problem, you can try clearing your network cache and see if that solves the error. This method includes three separate commands that you will have to execute via administrative command prompt. The network cache is basic data that your system collects while you are browsing the internet. If the cache is too much, it can create problems with your connectivity. To clear network cache, try the following steps:
4. Configure The TCP/IP Adress Manually
If you tried resetting your TCP/IP with the help of a command and it did not work out, you can try to reset these options manually. By doing so, you can verify that proper addresses are being put in the system. Here’s how you can reset the TCP/IP manually:
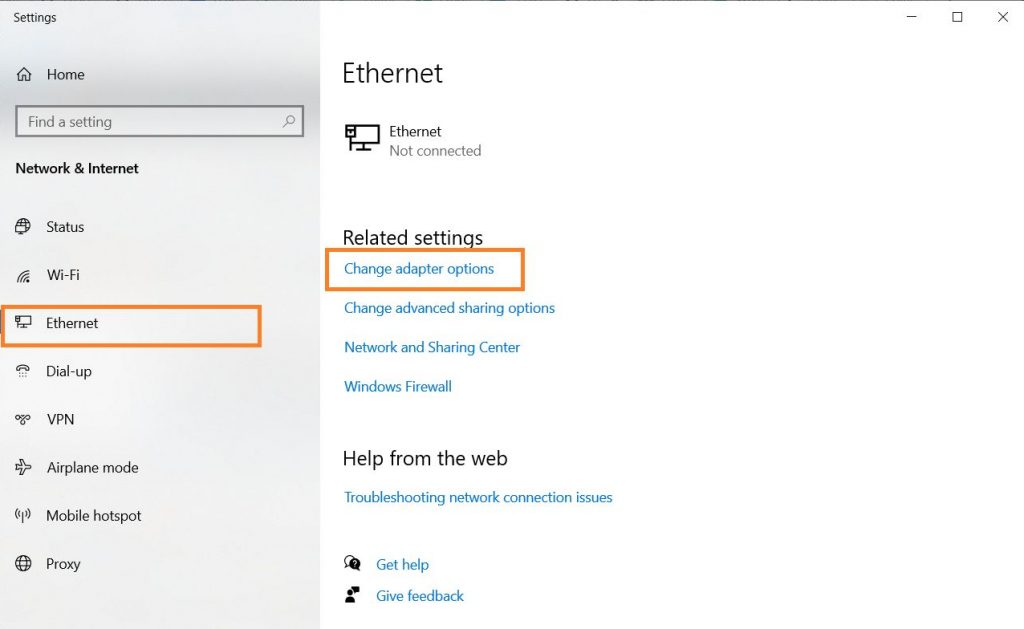
Right click on your internet connectivity icon and select the “Open Network & Internet settings” option.
As we are facing a problem with the ethernet connection, we will focus on that section. Click the ethernet option from the left hand column.
Now, you will see a “Related settings” section. Click the “Change adapter options” link from this section.
This will open the network connections window. here, you can see all ethernet connections connected to your computer. This will include active as well as inactive connections. Thus, make sure you proceed with the right ethernet option.
Right click on your active ethernet option and select “properties”.
Now, look for “Internet Protocol Version 4” in the list of items. Double click on it to change the address.
By default, the “Obtain IP address by default” is selected. Change that to “Use the following IP address” option for IP as well as DNS server. 8 For the IP address, you will have to contact your ISP and demand a static IP address which you can input in this section. For the DNS server, you can use the preferred DNS server as 8.8.8.8 and the alternate DNS server as 8.8.8.4 which are Google’s DNS servers.
Click ok to save your settings and see if the problem is resolved. Reconnecting your ethernet cable might also be helpful here.
5. Take A Look At Your Network Adapter
If you are sure that a driver is causing this problem, you can try to manually reinstall or update your network drivers. To do so, you will have to follow the steps given here:
Press “Windows+x” and select the “Device Manager” option from the list.
Now, you can see all of the connected hardware and their operating drivers in this window. Check the “Network adapter” section for network drivers.
Now, you will see all installed drivers on your system. If you only use one type of connection on your system, it is recommended to completely uninstall the other drivers from your system.
Choose your active ethernet driver and right click on it for additional options.
Select the “properties” option.
Now, you will see the driver properties. Open the “Driver” tab for additional settings.
Here, you can try to update the driver manually. Although, you can also uninstall the driver and restart your system to get a fresh driver installed in your system.
Make sure that you connect your ethernet cable after you boot your computer so that it detects the hardware changes.
Reinstalling this driver will surely fix the error for you.
Conclusion
We can assure you that one of the solutions suggested above will definitely fix the “Ethernet doesn’t have a valid ip configuration” problem in your computer. If you are still facing the problem, we will recommend you troubleshoot your network connection properly and find out whether it is the same problem or something else. And if you have any doubt, you can ask us your query in the comment section below. We can assure you that one of the solutions suggested above will definitely fix the “Ethernet doesn’t have a valid ip configuration” problem in your computer. If you are still facing the problem, we will recommend you troubleshoot your network connection properly and find out whether it is the same problem or something else. And if you have any doubt, you can ask us your query in the comment section below. Comment * Name * Email * Website
Δ
![]()
![]()
![]()


![]()
![]()

