Most of the Display Devices mentioned here are also compatible with other DIY environments like Raspberry Pi, ESP8266, ESP32 etc.
Introduction
A Display is an output device used to present information in visual form. Using a Display device in your Arduino or any other DIY Project is definitely an advantage as you can easily view the data / information on the display instead of, say, the serial monitor. There are several types of Display Devices available in the market that are compatible with Arduino with nice libraries. But choosing the right display for the project is an important task as you have to consider several aspects like price, size, resolution, ease-of-use, availability of libraries etc. I collected a list of some of the commonly used Arduino compatible Display Devices. I also added links to tutorials for that particular display device using Arduino. Take a look at the list and I hope it helps in narrowing down the right display for your next Arduino Project.
16×2 Character LCD
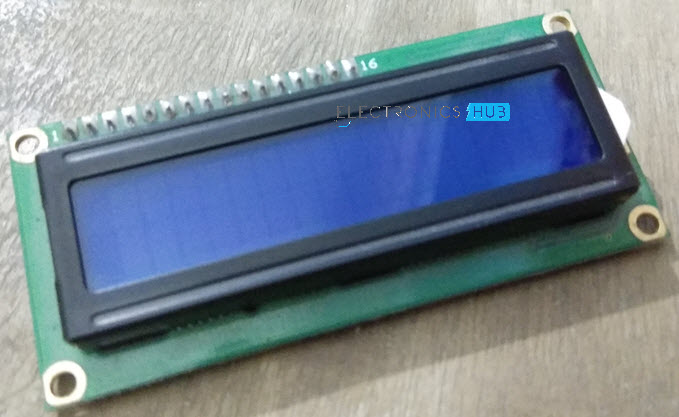
Perhaps the most commonly used Display Device with Arduino is the 16×2 LCD. It is an alphanumeric character display which means that this LCD is capable of displaying only numbers and characters (and very few custom characters). The numbers 16×2 represents the number of characters (16) per row and total number of rows (2). There is also a slightly bigger version of this display called the 20×4 LCD. As expected, it has 4 rows and 20 characters per row. Usually, the 16×2 Character LCD (and its bigger brother the 20×4 LCD) come with a backlight. Blue and Green backlight colours are very common. Both the 16×2 LCD and 20×4 LCD come with 16 pins. The following table describes the pins of a 16×2 LCD. 8-bit or 4-bit Parallel Communication is the only way for Arduino to communicate with a 16×2 LCD. Since this interface takes up a lot of Arduino’s pins, PCF8574 based I2C add-on boards are developed for 16×2 LCD. Using I2C based LCD reduces the required pins to just two (SCL an SDA of I2C). I made dedicated tutorial on “Interfacing 16×2 LCD with Arduino” and also on “How to Connect I2C LCD with Arduino”.
OLED Display
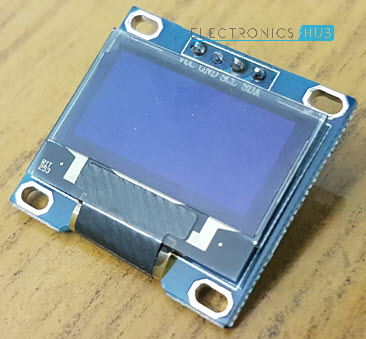
The next useful display device for Arduino is the monochrome OLED Display. OLED Displays have self-illuminating pixels i.e., each pixel is capable of producing its own light. So, there is no need for any backlight. Coming to Arduino OLED Displays, the most commonly used is the 128×64 pixel OLED Display which measures approximately 0.96” diagonally. Coming to the communication, OLED Displays are available in two interface options: SPI and I2C. Both look very similar except that pins are different in both these devices. The advantage of OLED over traditional Character LCDs is that it is a Graphical Display, which means, it is very easy to display bitmap images and characters with different fonts. If you want more information on OLED Display, check out the tutorial “Interfacing 128×64 OLED Graphic Display with Arduino”.
Nokia 5110 LCD
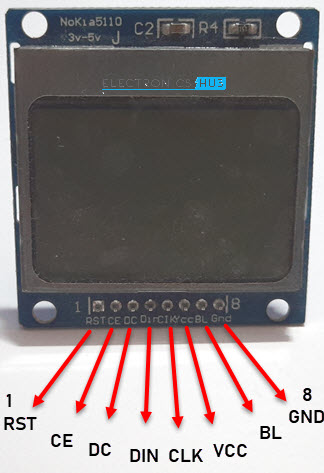
Originally developed for use in Nokia Mobile Phones, the Nokia 5110 LCD is slowly becoming a popular choice for Arduino Projects. It has a resolution of 84×48 pixels and it is a Graphical LCD. It is built around PCD8544 LCD Controller and uses SPI like Serial Communication Interface for data transfer. If you are interested in the pinout of Nokia 5110 LCD, then take a look at the following table. For Backlight, there are several options like Red, Blue, Green and White. I made dedicated tutorial on “Interfacing Nokia 5110 LCD with Arduino”. Check it out if you are interested. Since the Nokia 5110 is a graphical LCD, it is very easy to design a Graphical User Interface for your application, like a Menu System. Do check the “How to Design an Arduino Nokia 5110 LCD Menu System?” tutorial.
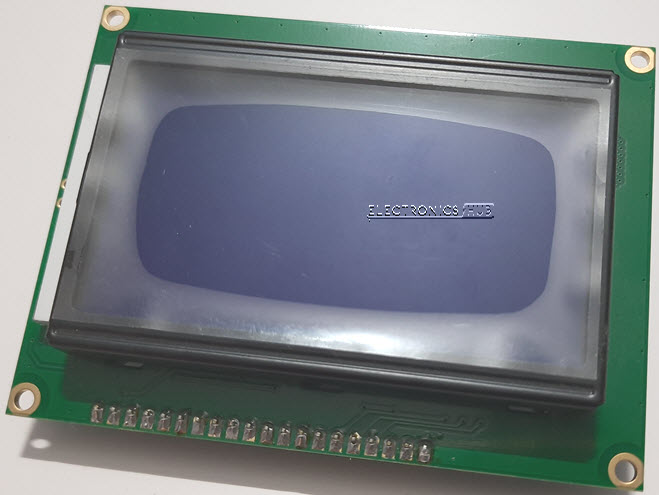
128×64 Graphical LCD
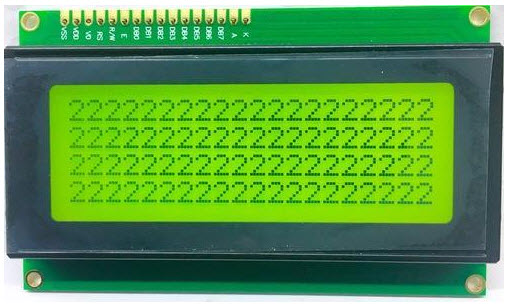
The next useful display device in the list is the 128×64 Graphical LCD. As the name suggests, it has a resolution of 128×64 pixels, which is greater than a Nokia 5110 LCD. Also, the size of the LCD is big, with a lot of real estate to work with. If you look at the pins of a typical 128×64 LCD, then it is very similar to a 16×2 LCD (but with couple extra pins). Essentially, the interface is also similar to that of a 16×2 LCD i.e., you can use a 4-bit or 8-bit parallel communication. But the interesting thing is it can also be configured to work with an SPI like Serial Interface, there by significantly reducing the required Microcontroller pins without any external hardware. Image Take a look at the pins in the following table. It is very important to know the LCD Controller used in the LCD Device as there are many options available and you have to select the appropriate Controller in the code. Some of the common controllers are:
KS0108 SSD1306 ST7920 SH1106 SSD1322
To learn more about 128×64 Graphical LCD Displays, visit “A Tutorial on Interfacing 128×64 Graphical LCD with Arduino”.
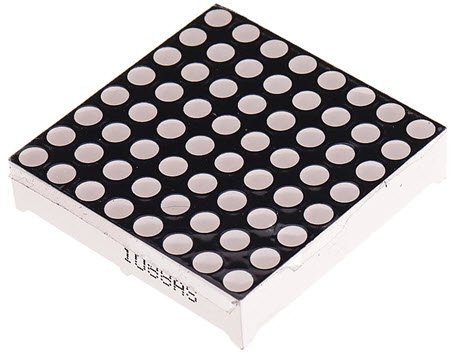
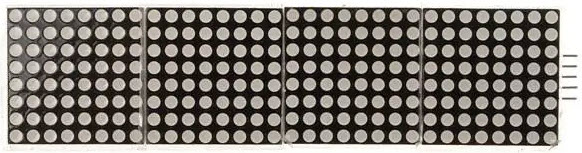
8×8 LED Matrix
Technically not a display device like the previous devices in the list, the 8×8 LED Matrix is an interesting visual device for sure. An 8×8 Matrix LED is a two-dimensional array of LEDs, which can display numbers, characters, simple graphical figures etc. It is usually available as a single colour LED matrix but dual colour and RGB LED Matrix are also possible. Since the 64 LEDs (8×8) are arranged in a 2D Matrix, you need 16 pins to drive all the LEDs. This is not a useful configuration. Hence, dedicated Display Driver ICs like MAX7219 are used to build modules around 8×8 LED Matrix so that Arduino (or other Microcontrollers) can communicate with MAX7219 through SPI. It is very easy to cascade multiple such modules to increase the pixel count. Visit the “Arduino 8×8 LED Matrix” tutorial to find out more about 8×8 LED Matrix.
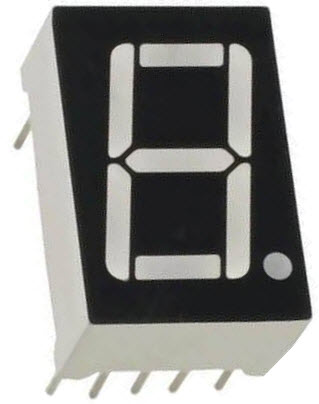
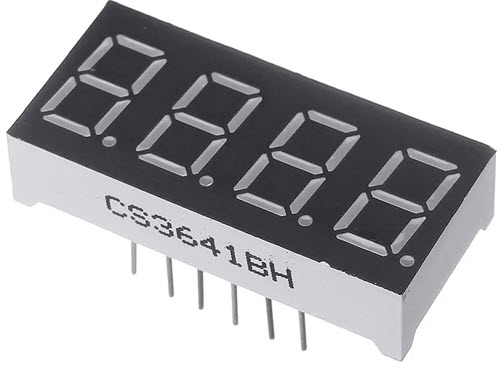
7-Segment Display
A Seven Segment Display or 7 Segment Display is another simple display device that you can use with Arduino. If your application requires displaying only numbers like Time or Quantity, then a 7 Segment Display is the cheapest and easiest option. As the name suggests, a 7-Segment Display consists of, well, 7 LEDs arranged in “Segments” to form an “8”. It is very easy to display digits from 0 to 9. Depending on the internal orientation of the LEDs, a 7-Segment Display can be either a Common Cathode Device or a Common Anode Device. One common configuration of 7 Segment Display is its availability as 4 – Digit Modules. Individual Seven Segment Displays also consists of a decimal point as a part of it. For more information on 7 Segment Displays, visit, “Arduino 7 Segment Display Interface” and for 4 – digit 7 – Segment Display, visit, “Arduino 4-Digit 7-Segment LED Display”.
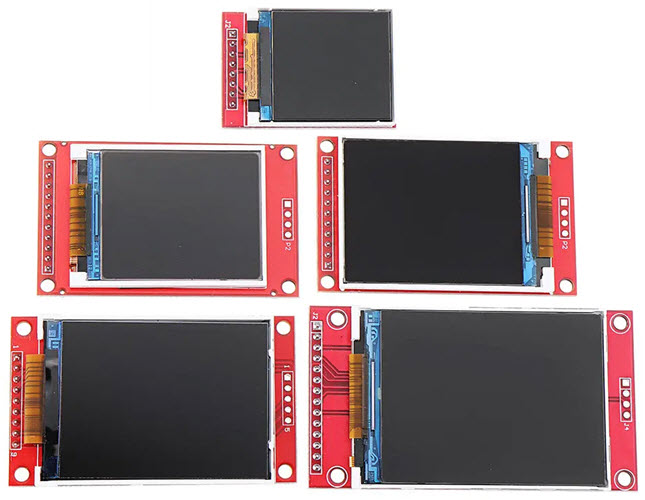
TFT LCD Display
The next two Arduino Display Devices are advanced modules (and even costly). If you want to create intuitive GUI (Graphical User Interface) between the system and the end user, then a colourful TFT LCD Display is your best option. A TFT LCD is a type of LCD Display which uses Thin-Film Transistors for better addressability and image contrast. Some of the commonly available TFT LCD Displays for Arduino are:
1.8” Display with a resolution of 160 x 128 Pixels. 2.0” Display with a resolution of 220 x 176 Pixels. 2.4” Display with a resolution of 320 x 240 Pixels. 2.8” Display with a resolution of 320 x 240 Pixels. 3.2” Display with a resolution of 400 x 240 Pixels. 3.5” Display with a resolution of 480 x 320 Pixels.
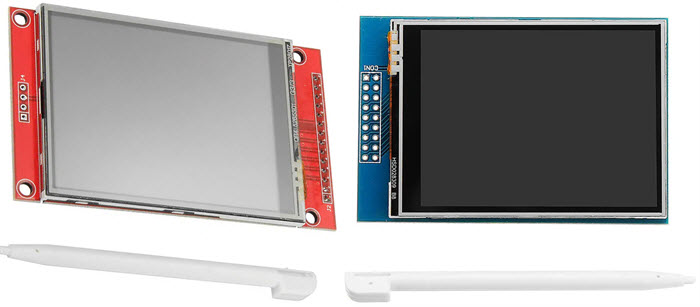
TFT Touchscreen LCD Display
In normal TFT LCD Displays, you can only display the information. In order to interact with the system, you need additional hardware like a Rotary Encoder or Push Buttons. The TFT Touchscreen LCD Display solves this problem by integrating touchscreen on to the TFT Display. It is very similar to a regular TFT Display (in terms of size and resolution) but with the added benefit of touchscreen. NOTE: I did not implement any project using TFT LCD Display and TFT Touchscreen LCD Display. I will update the links for tutorial once I complete those projects.
Conclusion
This was a brief look at 8 of the most common Arduino Display Devices to integrate in your project. Interfacing a Display Device with Arduino will certainly give your project a new look and finish, whether it is a simple Alarm Clock, Weather Station or a complex Menu Interface. Comment * Name * Email * Website
Δ
![]()
![]()
![]()

![]()
![]()

